P500 What did you do to/with your Pioneer 500 today?

T

Tstover

Well-Known Member
Dec 15, 2018
141
398
63
Central PA
Ownership

  1. 500
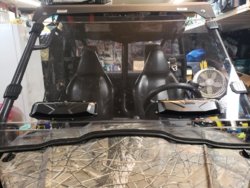
If you bolt on the Moose windshield it is not practical to unbolt it when you want to access under the hood. I bolted the straps to the cage then added some knobs for easy removal. Easy fix, it just always bugged me. That’s what I did!

View attachment 182645

I have the same issue with the Kolpin half (more like 1/3) windshield. Do those knobs have a stud attached?
 
Backwoods

Backwoods

Ambassador of Crocs / Speaker of truth & facts /
Lifetime Member
Mar 2, 2018
35,324
358,507
113
Douglasville ga
Ownership

  1. 700-2
I have a light bar just like the one you have. I'm having trouble finding brackets that have the bolts on the front so I can fasten it onto the bar. Where did you get yours?
Check PBR products I buy from them. The sell brackets that are Honda specific.
 
G

greatcsmith

Member
Nov 6, 2019
30
85
18
Georgia
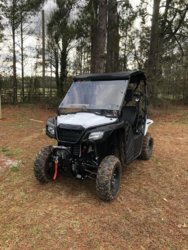
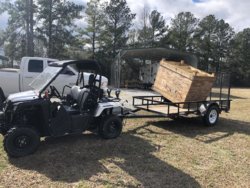
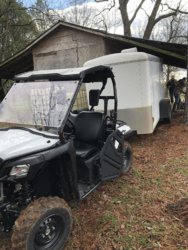
Getting stuff done down at deer camp yesterday! The little p500 is a beast!
F3409b8338a3594ce002ab25053123397f55d59a81fe69c85672c6288dc69285Ce8810da3275ef42730911d346c7fe2e


Sent from my iPhone using Tapatalk
 
Leep

Leep

Member
Jul 17, 2019
23
101
13
Sacramento
Ownership

  1. 500
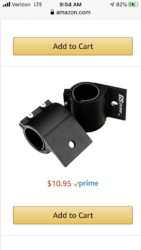
I have a light bar just like the one you have. I'm having trouble finding brackets that have the bolts on the front so I can fasten it onto the bar. Where did you get yours?
Amazon and you can just get the Allen wrench at the right angle to tighten. You need to have adjustment on the light bar to tilt it up because the bracket tilts down slightly to get wrench in. I like the bracket it a clean look

73C4C8DA E3CE 4D76 B074 8844CBB12926
 
futzin

futzin

Well-Known Member
Lifetime Member
Sep 10, 2019
4,187
31,075
113
Kentucky
Ownership

  1. 500

  2. 520
Got the torq locker in my P5 today. Gonna put every back together tomorrow morning. Can't wait to try it out!

Dude! Ya gotta let us know more about the install. I hope to be doing this soon. Would love to hear whatever tips/insight you can provide. Some folks are mechanically inclined; I'm mechanically declined.
 
SouthwestORV

SouthwestORV

Well-Known Member
Oct 24, 2018
744
1,731
93
Taylor, Arizona
Ownership

  1. 500
Took my buddy on a ride this afternoon - 40 mile loop in remote NE AZ. It was fun - let him drive Rambo for about half the ride and he was impressed with the ability to crawl in and out of tight spaces. Best part - we just had a great 2+ hour visit. Can't do that when you're both on bikes/quads.
 
advertisement
MB_Rider

MB_Rider

Well-Known Member
Lifetime Member
Sep 1, 2019
74
301
53
Swan River, Manitoba, Canada
Ownership

  1. 500
Dude! Ya gotta let us know more about the install. I hope to be doing this soon. Would love to hear whatever tips/insight you can provide. Some folks are mechanically inclined; I'm mechanically declined.
I had a hell of a time getting the diff out of the machine. I tried removing the top bolt of the driver's front bolt and removing the lower A arm bolts then using a ratchet strap pull the wheel up in the air to give me some room to work with. It help in some respect by pulling the axel out for me but I ended up completely removing the shock and axel since I couldn't get it out of the way to remove the diff. I ended up doing the same on the other side. I removed the first 5 bolts that hold the front skid plate on so I can use a wrench to remove the sensor that connects to the diff on the driver's side (that bolt is f***ing long lol). I the removed the plastic cover for the 4WD selector switch and removed the nut underneath the cable to remove the selector switch's cable (removing those bolts for the skid plate helped there too) . I unbolted the plastic housing for the selector switch and unbolted the 2 large bolts that keep the diff in place and the front mounting bracket. I disconnect the front drive shaft front the diff disconnected the diff vent tube and slide the diff underneath where the skid plate was. Between trying to figure out how to do it, hunting for the tools I needed (my employees can't seem to put tools back where they belong) and vent some rage when I hit my hand on something metal when cracking a nut loose removing the diff. Took me 4 hours. After a stiff drink and a large supper taking apart the diff and replacing the spider gears with the torq-locker and putting it back together took me maybe 30 minutes. All I have to do now is do the exact opposite and hopefully it'll be all good. I did not redimple the diff thinking since I didn't need to drill anything when removing the cross pin. I'm thinking that since it took a lot of force to drive the cross pin out enough to remove the center and just as much force if not more to drive it in that I do not need to try and redimple. I made the mistake of removing the diff mounting bolts before unbolting everything else first so it wanted to slide everywhere. I think disconnecting the drive shaft from the diff and then sliding the diff from underneath was a good idea as opposed to trying to slide out from the side. I like to work with my hands but I'm only somewhat mechanically inclined. If you'd like futzin I can DM you my email and I can help you step by step with yours! Itnwas stressful for me to do it at times but I know it will be worth it!
 
Last edited:
MB_Rider

MB_Rider

Well-Known Member
Lifetime Member
Sep 1, 2019
74
301
53
Swan River, Manitoba, Canada
Ownership

  1. 500
Dude! Ya gotta let us know more about the install. I hope to be doing this soon. Would love to hear whatever tips/insight you can provide. Some folks are mechanically inclined; I'm mechanically declined.
I'll try and take some pics as I put it back together to give a better idea as how I did it.
 
DG Rider

DG Rider

Member: Triple Clutch Club
Lifetime Member
Aug 14, 2013
9,459
43,105
113
Casa Grande, AZ
Ownership

  1. 700-2
So I thought I'd share my new rear view mirror setup. Tried it out yesterday and it works great
I had the small mirror part you see stuck to the roof (it's one of those aux adhesive mirrors from the auto parts stores), but I could only see things that were really right up on my butt, so something better was needed. AZ law states that to be street legal, you must have one...not to mention that you really should have one for courtesy reasons, but the 500 doesn't have much room, and problems exist.

I don't like the side view ones because they get broken, though I may try that in the future and just leave them loose enough to fold away. The trouble with a fixed one in the center is that while they work and are cheap enough, I tend to hit it with my head due to the space constraints in the 500, esp when going for the parking brake. Hitting my head against glass often seems like a bad ideal.

So...I removed the old adhesive from my existing one, and carefully pried the mirror out of the housing (I don't think this is glass...Seems like plastic). I then drilled a hole in the center and inserted a machine screw. I found part of an old phone mount in the seat of a used car I was working on, and drilled a matching hole in it with a wing nut on the backside, then reinstalled the mirror.
I then used Velcro to attach it to the roof, so if I did whack it with the old melon, it simply breaks away...and can be removed for trailering. The roof does shake a bit at idle, but the main goal here is keeping an eye on machines that are behind me, not reading novels laying in the bed, and at speed it works well.
20200209 123908
20200209 123932
20200209 123940
20200209 123951
 
Mudder

Mudder

NTC Ambassador of Walls
Lifetime Member
Oct 1, 2016
11,663
88,099
113
Georgia
Ownership

  1. Other Brand

  2. 500
“ I removed the first 5 bolts that hold the front skid plate on so I can use a wrench to remove the sensor that connects to the diff on the driver's side (that bolt is f***ing long lol). ”
My hint. The 4wd sensor wire pulled off on mine, removing its threaded bolt was twisting the wire too much.
 
advertisement

About us

  • Our community has been around for many years and pride ourselves on offering unbiased, critical discussion among people of all different backgrounds. We are working every day to make sure our community is one of the best.

User Menu

Buy us a beer!

  • Lots of time and money has gone into making sure the community is running the best software, best designs, and all the other bells and whistles. Care to buy us a beer? We'd really appreciate it!

    Beer Fund!

    Club Membership!