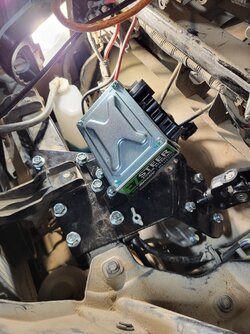
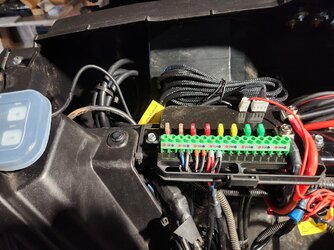
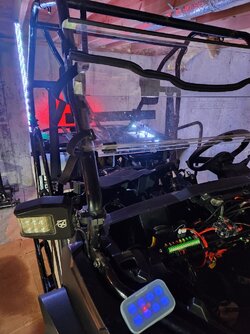
P500 Need help with electrical plan

futzin

futzin

Well-Known Member
Lifetime Member
Sep 10, 2019
4,172
30,964
113
Kentucky
Ownership

  1. 500

  2. 520
Finished the bumper/winch install.
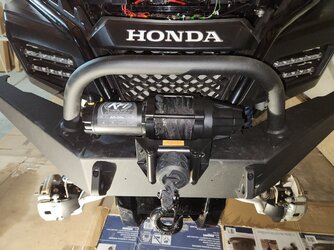
20240227 181030

Wired up the Aux 8 components. Connected the horn and the lighted mirrors. What do I need to do to make the horn activate only during button push? Currently have the two supplied wires to the + and - on the Aux control panel.
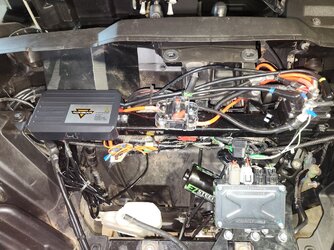
20240227 185008

Tested a 3' whip. Battery in the remote may be dead, this is all they would do. Wires don't reach to front; I'll guess I'll splice more wire in . . .
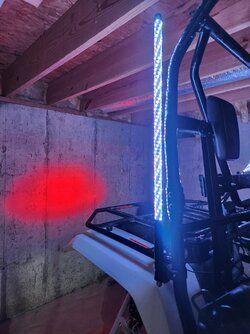
20240227 191612
 
Last edited:
906UP

906UP

Well-Known Member
Lifetime Member
Supporting Member
Club Contributor
Jul 6, 2017
14,270
135,354
113
da Yoop
Ownership

  1. 1000-3

  2. Talon X
Finished the bumper/winch install.

View attachment 419653

Wired up the Aux 8 components. Connected the horn and the lighted mirrors. What do I need to do to make the horn activate only during button push? Currently have the two supplied wires to the + and - on the Aux control panel.

View attachment 419651

Tested a 3' whip. Battery in the remote may be dead, this is all they would do. Wires don't reach to front; I'll guess I'll splice more wire in . . .

View attachment 419652
You need to program that button as a momentary switch, that way it's only on when the button is pressed. The pamphlet that came with the Auxbeam will explain it, it's pretty simple
 
futzin

futzin

Well-Known Member
Lifetime Member
Sep 10, 2019
4,172
30,964
113
Kentucky
Ownership

  1. 500

  2. 520
Another question:

I'm pretty sure I'll relocate the cubes to the rear roof corners. Fairly common for me to remove the Honda roof.

For quick disconnect/reconnect, are bullet splice connectors a good option? Others?
 
906UP

906UP

Well-Known Member
Lifetime Member
Supporting Member
Club Contributor
Jul 6, 2017
14,270
135,354
113
da Yoop
Ownership

  1. 1000-3

  2. Talon X
silvertrd09

silvertrd09

Well-Known Member
Lifetime Member
Feb 17, 2018
280
1,555
93
Texas
Ownership

  1. 500
Power steering kit not playing well with RB3 steering rack.
Shaft knuckle narrowly misses brake reservoir (normal) but rubbing hard some brake gizmo.

View attachment 418651
View attachment 418652

I can maybe move the mounting plate 1/8", but it won't be enough.

View attachment 418653
Got the EZ steer in tonight but the short steering arm is hitting on the brake reservoir and moving it a bit. I don't have a RB3 kit. So not sure what's going on. In the morning I'll move the mounting plate over like you did. Don't think I can move the reservoir.
 
futzin

futzin

Well-Known Member
Lifetime Member
Sep 10, 2019
4,172
30,964
113
Kentucky
Ownership

  1. 500

  2. 520
Yeah, the tolerances are tight. Pretty much have to shift the bracket to passenger as much as possible. I had my wife hold it there while I dogged it down, but others have used a ratchet strap which would be better, prolly.

Good luck.
 
advertisement
The Green Goat

The Green Goat

LGBTQ Compliance Officer -Lotta gays in this place
Lifetime Member
Supporting Member
Sep 7, 2020
2,190
16,182
113
Ohio
Ownership

  1. 520
Yeah, the tolerances are tight. Pretty much have to shift the bracket to passenger as much as possible. I had my wife hold it there while I dogged it down, but others have used a ratchet strap which would be better, prolly.

Good luck.
If I ever have to do it again, I'm putting the plate in first and drilling a self-tapper through it to hold it in place.
 
silvertrd09

silvertrd09

Well-Known Member
Lifetime Member
Feb 17, 2018
280
1,555
93
Texas
Ownership

  1. 500
Yeah, the tolerances are tight. Pretty much have to shift the bracket to passenger as much as possible. I had my wife hold it there while I dogged it down, but others have used a ratchet strap which would be better, prolly.

Good luck.
If I ever have to do it again, I'm putting the plate in first and drilling a self-tapper through it to hold it in place.
I ended up banging the s**t out of the mounting plate where the wing nut is in the pic and got the lower shaft to clear.

Putting a self tapping screw would not be a bad idea. 👍

20240302 110539
 
906UP

906UP

Well-Known Member
Lifetime Member
Supporting Member
Club Contributor
Jul 6, 2017
14,270
135,354
113
da Yoop
Ownership

  1. 1000-3

  2. Talon X
JACKAL

JACKAL

Ancient Honda fanboi
Moderator
Lifetime Member
Supporting Member
Club Contributor
Jun 11, 2015
39,836
272,156
113
Pioneer, TN
Ownership

  1. 1000-5

  2. Talon X4
I just received several parts from the club store for setting up a new build. Going with the single 80 Amp Relay to fuse box with remote control switch harness for full off or Key-On Power or, Full time On Power options. Here a very basic diagram of theses 4 parts to the main battery.

Relay / Isolator : 80-AMP Battery Isolator or Relay - Compare to Stinger brand.

Relay Control Switch: Pre-Wired Relay Control Switch for AUX and Key-on usage. For Stinger, Cole Hersee or any.

Fuse Box: Fuse box with negative bus. 6 or 12 fuse unit, includes variety of fuses. FuseBox

Key on Power Pigtail: 2022+ Honda Power ACC pin for Key-on power. Pioneer, Talon


As this would apply to a Pioneer 500 would only need one each Positive & Negative cable 4 or 6 gauge to the front Relay(POS) & Fusebox (NEG)
Diagram of Relay 3 Way Switch and fuse box


Here is a workbench setup sans Key-on power plugged in.
20240304 181819
 
futzin

futzin

Well-Known Member
Lifetime Member
Sep 10, 2019
4,172
30,964
113
Kentucky
Ownership

  1. 500

  2. 520
You’re making some head way with Futzin’ …. You got a long way to go with me! 🤣🤣

Well let's see:

Off the top of my head, you've installed the Torq Locker, replaced your fuel pump assembly, identified and corrected the roll cage issue, suggested the use of push pins for the 520 Quick Shield install, came up with and implemented a speaker mount for the JBL Xtreme, mounted a rear cargo box. I'm quite sure I'm missing some stuff.
 
KyGal83

KyGal83

KGB, SNS, Duchess Sheldon, Ms. Daisy, Natasha
Lifetime Member
Feb 3, 2021
8,942
88,327
113
Kentucky
Ownership

  1. 500
Well let's see:

Off the top of my head, you've installed the Torq Locker, replaced your fuel pump assembly, identified and corrected the roll cage issue, suggested the use of push pins for the 520 Quick Shield install, came up with and implemented a speaker mount for the JBL Xtreme, mounted a rear cargo box. I'm quite sure I'm missing some stuff.
I did do those things.. 🤔. Only a couple are mechanical… but I am damn proud of that Torq locker install! #girlpower ✊🏻

You on the other hand are on your 3rd buggy overhaul, did more than 1/2 the upgrades to mine also, 3rd winch install, in the middle of a major rewiring plan, Mudbuster installs, power steering installs… and let’s not forget 4… 4 Reverse override mods. Come on… you’re a professional, I am still in apprentice mode. 🤣

That also reminds me I need to finish the write up on my fuel assembly replacement. (Adds to the to do list)
 
advertisement

About us

  • Our community has been around for many years and pride ourselves on offering unbiased, critical discussion among people of all different backgrounds. We are working every day to make sure our community is one of the best.

User Menu

Buy us a beer!

  • Lots of time and money has gone into making sure the community is running the best software, best designs, and all the other bells and whistles. Care to buy us a beer? We'd really appreciate it!

    Beer Fund!

    Club Membership!