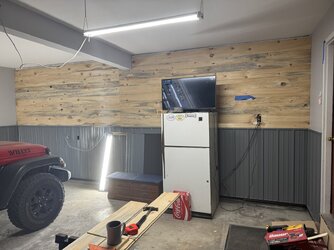
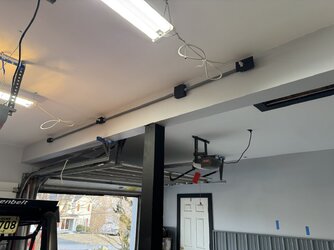
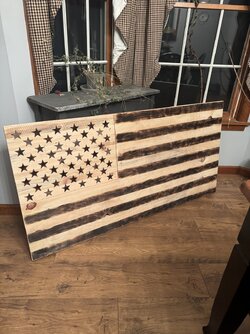
Multi Want to start a discussion about everyone's home shop and shop projects.

ToyMan

ToyMan

Active Member
Sep 26, 2024
30
112
33
Carson Valley, NV
Ownership

  1. 1000-5
IMG 3249
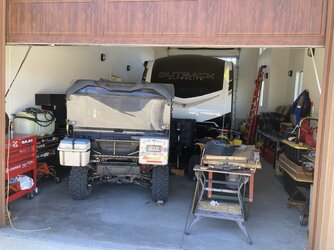
My shop/RV bay. The building is 40ft deep, there is a home machine shop behind the auto bay.

IMG 3248
RV bay, Looking for a spare wheel/tire to mount on the carrier.

IMG 3246
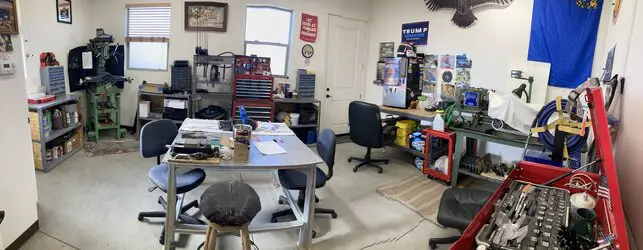
Panorama of the ‘dirty’ part of the shop, all welding, cutting, grinding…messy stuff is done there. I pull my Baby (Cummins) out when I get grinding/plasma cutting/welding savage.

IMG 3244
Panorama of the back room. No grinding or abrasives allowed. A little Rong Fu mill/w custom base, all DRO’d, HF air over press, Jet 12” lathe, all DRO’d, 1/2 bath and washtub out of picture to the left and most importantly
a fridge packed with 29 degree cold IPA.

IMG 3254
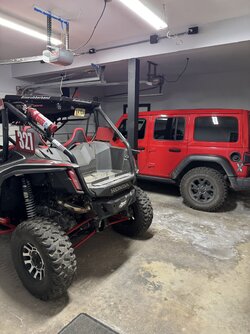
Panoramic of the house garage….I like 4Runners…..
 
Last edited:
DRZRon1

DRZRon1

Well-Known Member
May 11, 2019
1,292
4,080
113
PA
Ownership

  1. Talon X
View attachment 456409
My shop/RV bay. The building is 40ft deep, there is a home machine shop behind the auto bay.

View attachment 456422
RV bay, Looking for a spare wheel/tire to mount on the carrier.

View attachment 456410
Panorama of the ‘dirty’ part of the shop, all welding, cutting, grinding…messy stuff is done there. I pull my Baby (Cummins) out when I get grinding/plasma cutting/welding savage.

View attachment 456411
Panorama of the back room. No grinding or abrasives allowed. A little Rong Fu mill/w custom base, all DRO’d, HF air over press, Jet 12” lathe, all DRO’d, 1/2 bath and washtub out of picture to the left and most importantly
a fridge packed with 29 degree cold IPA.

View attachment 456412
Panoramic of the house garage….I like 4Runners…..
awesome !!!!!


smart
 
  • Like
Reactions: Rayger143
MI-Trailblazer

MI-Trailblazer

Well-Known Member
Apr 4, 2019
291
1,435
93
Parma, MI
Ownership

  1. 500
I just found this thread yesterday and after reading through it all, you guys have not only prompted me to post up pictures of my shop, but also have motivated me to try and start getting back to finishing the inside and organizing things better!

So to start, here is the build of my shop:
1  barn floor cement as of 10 18 06
We start with the 40' x 80' - 6" re-enforced cement pad with 22 1-ft dia. 48" deep pilons with 3/4" J-bolts in them. My only regret was that the guy that poured the cement and finished it asked me if I wanted him to put the pex tubes in it? I said no (dumb ass).
2  Barn site as of 6 24 07

The J-bolts then got brackets attached to them, then the post/truss assembly you see in this pic. is assembled laying on the cement pad with mating brackets attached to the bottom of the posts. These brackets then act as a hinge and you stand-up the post truss assembly, I did so using cables, snatch blocks and my tractor.
3  looking from west end of barn  7 10 07

Once you get 2 of the post / truss assemblies up you attach the purlins and girts, then build and stand up the next pole/ truss assembly and continue on till you get to the other end.
4  resized   Barn as of 7 16 07


5  barn roof as of 10 13 07

Once you had the structure up the roof was next. I was talked into covering the structure with the foil - bubble wrap for "cheap" insulation to start off with. I also at this time could not afford a metal roof (metal prices crazy in 2007) so with shingles I put the bubble/foil insulation down first to the purlins, then put 2x4's over the bubble/foil, then attached the roof sheeting to the 2x4's creating my air gap for the soffit and ridge vents. Also the bubble wrap does actually work - the inside of the barn stays 10 to 15 degrees cooler than the outside temp. in the summer and 10 - 15 warmer in the winter.
6  Southwest corner as of 11 18 07
Once the roof was done, time for the end walls and steel siding.
7  SE corner of barn 1 9 08

8  barn as of 1 9 08

So I cannot take credit for this entire construction project. I made it up to having 3/4 of the roof done, snow was about to fly and I was only working on it on weekends, so I hired the crew that did my house addition to finish the roof and do the end walls and siding. As well as I have a bad track record with hanging overhead doors, so I hired that out as well.
9  inside barn SE corner as of 5 28 09

On the inside there is a 40'x40' loft over the back half. In the picture above you can see the start of the chaotic mess in there was the "rushed" necessity to get stuff out of the weather and out of the yard. Over time I added some of the electric, insulated one corner so I could some-what set up a work area and not need to move everything again to finish things.
10  inside barn SW corner as of 5 28 09
For the walls I was just putting up 2x6's to match the window opening framing, put up roll fiberglass insulation, then hanging drywall - no tape no mud then primer and paint.
11  Loft progress 2014
This is a shot of the loft floor construction. All the floor joists are in now. I have a couple of the wedge plate boards to cut and install between the bottom of the joists and the bottom lip of the I-beam. Then start gluing and screwing the floor sheeting down. Still a lot of work to go to finish it. You have me now planning when I can get started on it again!
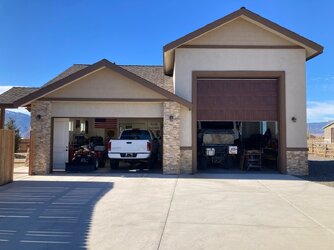
 
MI-Trailblazer

MI-Trailblazer

Well-Known Member
Apr 4, 2019
291
1,435
93
Parma, MI
Ownership

  1. 500
Since my post above was getting huge, I'll add some of my "why did you do thats?" in this one.

I've always wanted a pole barn to work out of, but being an old barn lover, I did not want to put up a pole barn that looked like every other pole barn. So after doing a lot of figuring I settled on the 40' x 80' size with the front half open for the workshop, then the back half lofted, with vehicle/toy storage under and parts and everything else storage on the loft.

I wanted the gambrel roof for 2 reasons: 1) the look, 2) I wanted to clear-span it and put a tall over-head door in the end and keep the side walls shorter. My first hurtle for these plans was the clear-span 40' trusses. I found that I could go with scissor trusses in the front half then attic trusses on the back half. Only this was going to cost about $28k just in trusses.

My next delema was I went an bought an RV. Well, building a barn, not going to leave the RV sitting outside, so my "planned" 8" side walls went to 12' so the RV fit under the loft. This increased the complications for the loft supporting a load and was looking like my plans were over.

Then I found this company called Scocket Systems in PA. I called them several times and had in-depth conversations about what I wanted to do and eventually, we drew up plans and I purchased the building system from them. Unfortunately, the owner passed away in 2016 and the company is now closed.

The brackets were all standard Scocket System parts, but then the gambrel steel I-beam roof frames and loft floor I-beam was fabricated by Scocket Systems supplier. Even with this, all the steel and the kit, delivered to me from PA. was only $9k. Therefore, I saved $18k in just roof trusses.

Thats all I got for now. IF I think of more I'll post it.
 
MI-Trailblazer

MI-Trailblazer

Well-Known Member
Apr 4, 2019
291
1,435
93
Parma, MI
Ownership

  1. 500
Good use of what you have there Tramguage! I think the doors I have hung came with some measurements that helped with figuring the track placement. I'm not going to say I did the math right, for the doors I hung did not really work right.😖

Also a little update- this is currently what the inside of my shop has looked like for probably the last 8 years. Hence my need to finish things and get organized:
Current mess in barn
 
Tramguage1

Tramguage1

Texan
Moderator
Lifetime Member
Supporting Member
Club Contributor
Jul 2, 2015
7,529
30,981
113
Somereset, Texas
Ownership

  1. 1000-5

  2. 1000 6 Crew

  3. Talon X

  4. Talon R4 LV
Good use of what you have there Tramguage! I think the doors I have hung came with some measurements that helped with figuring the track placement. I'm not going to say I did the math right, for the doors I hung did not really work right.😖

Also a little update- this is currently what the inside of my shop has looked like for probably the last 8 years. Hence my need to finish things and get organized:
View attachment 456694

I found out when hanging rollup doors you install the brackets that hold the door, then center it in the hole. Next pre tention the door slightly and block it from spinning. Next cut the wrapping and let about 1-1/2 to 2 foot of the door down. Install the tracks leaving about 3/8" gap on both sides. Install the upper stops and let the dor up to stops and instal last track screws.
Hardest pat is putting the doors on the mounting brackets.

FYI some doors you mount the upper brackets and door to the tracks and stand it all up in one assembly.
20250117 104110
 
MI-Trailblazer

MI-Trailblazer

Well-Known Member
Apr 4, 2019
291
1,435
93
Parma, MI
Ownership

  1. 500
Nice progress there Tramguage! Love the use of the lean-to over hangs to get stuff out of the sun and weather. I may end up with a lean-to off the side of my shop as well.

Worked great at my horse barn. Took the 40' x 32' pole barn and put 20' lean-to's off both 40' sides. Closed one in and made 2 stalls and a tack room inside, then left the other open and put all the farm field equipment under it. Also use that open space for extra hay storage.
 
advertisement

About us

  • Our community has been around for many years and pride ourselves on offering unbiased, critical discussion among people of all different backgrounds. We are working every day to make sure our community is one of the best.

User Menu

Buy us a beer!

  • Lots of time and money has gone into making sure the community is running the best software, best designs, and all the other bells and whistles. Care to buy us a beer? We'd really appreciate it!

    Beer Fund!

    Club Membership!