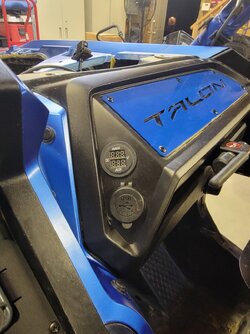
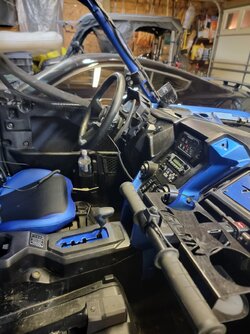
Scoop's 2023 Talon 1000R Fox Live Valve

Scoop

Scoop

Well-Known Member
Lifetime Member
Supporting Member
Sep 7, 2021
5,224
20,673
113
Michigan
Ownership

  1. Other Brand

  2. 1000-5

  3. Talon R LV
What tablet and app are you using? I love the interface
Sorry, didn't see this. It's a Samsung Tab A7 10.4". The interface is called AGAMA Car Launcher. It's a launcher app you'll mostly find in use on Android-based car stereos.
 
Scoop

Scoop

Well-Known Member
Lifetime Member
Supporting Member
Sep 7, 2021
5,224
20,673
113
Michigan
Ownership

  1. Other Brand

  2. 1000-5

  3. Talon R LV
Getting the Talon ready for TO 2024, so I had some bits laying around that I ordered over the winter that I needed to get installed.

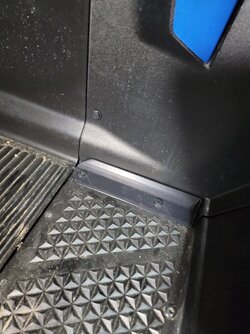
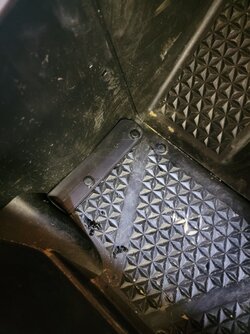
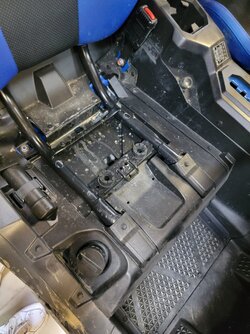
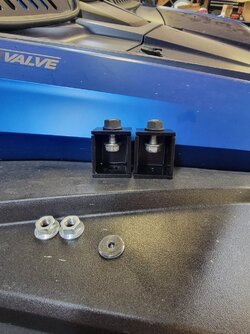
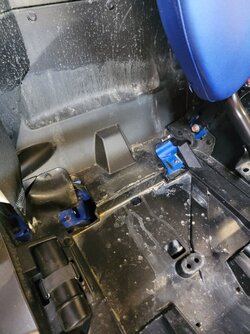
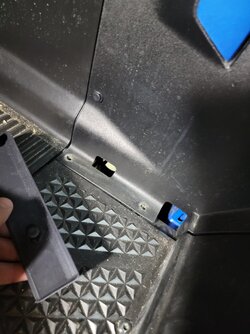
First, I installed a set of the floor drain hole covers from 10-80 Dirt Sports from @highpocket74. I've lost track of the number of screws, nuts, and other things I've dropped on the floorboard that went right down those @#$%ing holes.

The covers that are against the console just re-used the holes and Honda pushpins that were already there, while the outside holes required me to drill 5/16" holes for those pushpins. Easy-peasy. They don't seal the drain holes or anything, so water will still drain out.

07/19/2024 EDIT: While these do allow water to drain out, all the dirt related earthen material will not pass through. So when you wash out your buggy, your floors will still be full of crap. I suppose if I pulled the pins before washing, that would address the issue, but kind of a PITA to do that every time.

2024 05 15 185259 2024 05 15 185317 2024 05 15 184327
 
Last edited:
Scoop

Scoop

Well-Known Member
Lifetime Member
Supporting Member
Sep 7, 2021
5,224
20,673
113
Michigan
Ownership

  1. Other Brand

  2. 1000-5

  3. Talon R LV
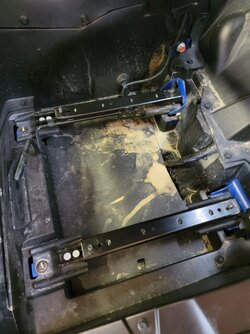
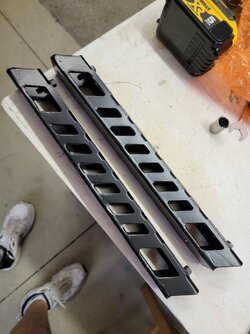
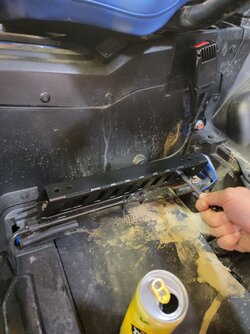
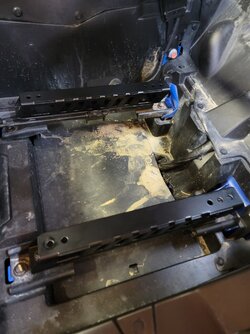
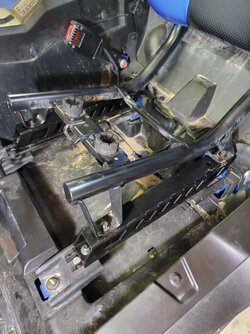
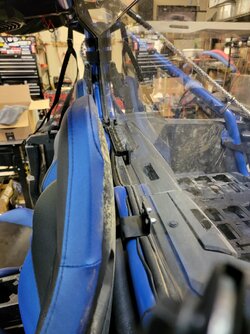
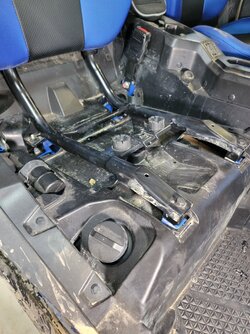
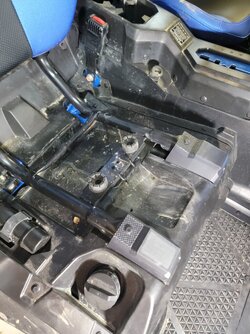
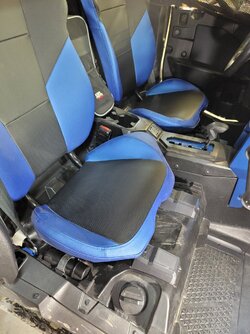
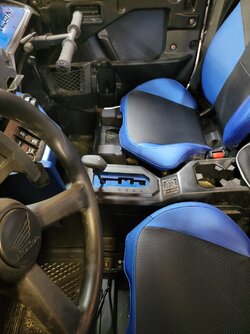
Next was the driver's side seat risers from 10-80 Dirt Sports. These not only raised the seat 1.5", but it I installed them in the rear-most holes, which pushes the driver's seat back 40MM from the stock position. Nothing like a little extra leg room.

2024 05 15 185410 2024 05 15 185427
2024 05 15 190004 2024 05 15 190230
2024 05 15 191402 2024 05 15 191531
2024 05 15 191545

Sorry for the dirty buggy, but I'll be giving her a bath tomorrow.
 
Scoop

Scoop

Well-Known Member
Lifetime Member
Supporting Member
Sep 7, 2021
5,224
20,673
113
Michigan
Ownership

  1. Other Brand

  2. 1000-5

  3. Talon R LV
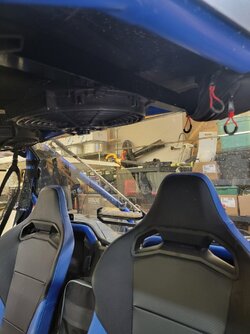
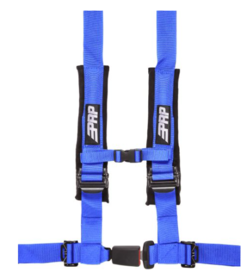
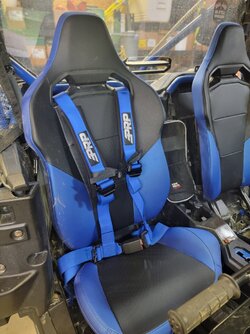
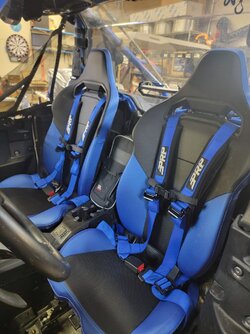
Working on the harness install. Not in any rush. Haven't decided if I will remove the retractors yet ... might wait until after a ride (MOM5?) to make sure I and Mrs Scoop like the 4 point harnesses.

20240613 192028
 
Last edited:
Bad_bowtie

Bad_bowtie

Huge member
Lifetime Member
Jun 29, 2016
2,557
15,771
113
East Tennessee
Ownership

  1. 1000-5

  2. Talon X4
Working on the harness install. Not in any rush. Haven't decided if I will remove the retractors yet ... might wait until after a ride (MOM5?) to make sure I and Mrs Scoop like the 4 point harnesses.

View attachment 432867
Lookin' good. About to do the same. My harnesses were delivered yesterday.
 
Coeus

Coeus

Major General
Lifetime Member
Dec 9, 2019
72,643
671,114
113
Signal Mountain, TN
Ownership

  1. 1000-5

  2. Talon R4 LV
Working on the harness install. Not in any rush. Haven't decided if I will remove the retractors yet ... might wait until after a ride (MOM5?) to make sure I and Mrs Scoop like the 4 point harnesses.

View attachment 432867
Generals Wife loves the 4-point harness over the Pioneer seat belt… so I just ditched the factory belts..
 
advertisement
Scoop

Scoop

Well-Known Member
Lifetime Member
Supporting Member
Sep 7, 2021
5,224
20,673
113
Michigan
Ownership

  1. Other Brand

  2. 1000-5

  3. Talon R LV
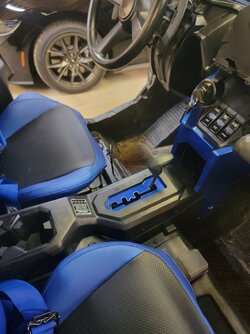
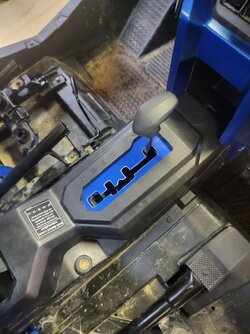
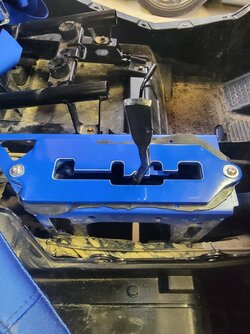
Did the inverted CJ boot mod to keep swamp ass gas from rising through the shifter area.

@highpocket74, this is the 2nd one with the Prismatic Powder that better matches the blue (ROPS) for the '23 Talon. It's not night and day versus the first one we did, but I do like it better. There's more blue in it.

Oh, and I was bummed when I thought you sent me the wrong one -- until I realized I put it on 180 degrees and flipped. 😄

20240629 201727 20240629 201249
Screenshot 20240629 201451 Gallery

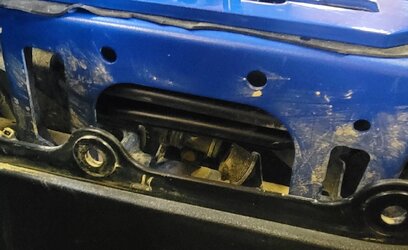
Here's my case of the dumbass move:

20240629 194233
 
Scoop

Scoop

Well-Known Member
Lifetime Member
Supporting Member
Sep 7, 2021
5,224
20,673
113
Michigan
Ownership

  1. Other Brand

  2. 1000-5

  3. Talon R LV
Well, I didn't want the recent onslaught of new Talon owners to suffer the pain get all the joy of spending money on accessories, so I added a little something to the 'ole '23 T1K2FLV today. Order placed, install pics to come.

Honda Talon Complete Communication Kit with Bluetooth Intercom and 2-Way Radio (696+ and G1 GMRS)
Ultimate Headset for STEREO and OFFROAD Intercoms - Over The Head (x2)
Rocker Power Switch for Waterproof Mobile Radios and Rugged Intercoms
Baja Boot Offroad Mobile Radio and Intercom Weather Guard Protection

And just in case I have any issues mounting the M1 GMRS radio in the Talon panel with my aftermarket GPS mount installed, I have a temporary backup plan:

Block Off Plate for Rugged M1 , G1, RM60 , GMR45 Mobile Radio Mounts
Rugged and Kenwood Handheld Radio Jumper to Harness - Extra Long

I looked into Rugged Radios, UTVCOM, and PCI Race Radios and felt Rugged was the best solution for our needs. Props to Owen for taking all my calls, answering all my e-mails and texts, and putting up with all my questions.
 
Robobrainiac

Robobrainiac

Well-Known Member
Lifetime Member
Jul 15, 2020
2,583
9,079
113
Missouri
Ownership

  1. 1000-5
I think you will like the rugged headset. I did the 696 plus, Baofeng UV-82 radio, and Alphabass headsets on the Teryx and the family really enjoys it. During my research I found that Rugged had the largest selection with plenty of durability claims/proof. I typically received quick responses thru email.
Well, I didn't want the recent onslaught of new Talon owners to suffer the pain get all the joy of spending money on accessories, so I added a little something to the 'ole '23 T1K2FLV today. Order placed, install pics to come.

Honda Talon Complete Communication Kit with Bluetooth Intercom and 2-Way Radio (696+ and G1 GMRS)
Ultimate Headset for STEREO and OFFROAD Intercoms - Over The Head (x2)
Rocker Power Switch for Waterproof Mobile Radios and Rugged Intercoms
Baja Boot Offroad Mobile Radio and Intercom Weather Guard Protection

And just in case I have any issues mounting the M1 GMRS radio in the Talon panel with my aftermarket GPS mount installed, I have a temporary backup plan:

Block Off Plate for Rugged M1 , G1, RM60 , GMR45 Mobile Radio Mounts
Rugged and Kenwood Handheld Radio Jumper to Harness - Extra Long

I looked into Rugged Radios, UTVCOM, and PCI Race Radios and felt Rugged was the best solution for our needs. Props to Owen for taking all my calls, answering all my e-mails and texts, and putting up with all my questions.
 
  • Like
Reactions: Remington and Scoop
Scoop

Scoop

Well-Known Member
Lifetime Member
Supporting Member
Sep 7, 2021
5,224
20,673
113
Michigan
Ownership

  1. Other Brand

  2. 1000-5

  3. Talon R LV
Began the long install of the Rugged Radios setup for the Talon.

Hood, upper cowl panel, and full glass windshield removed to facilitate the installation and wiring.

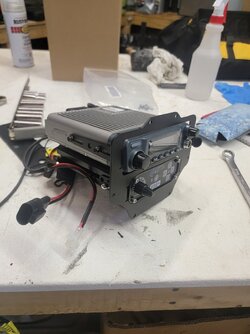
Mounting the 696+ intercom and G1 GMRS radio into the Talon mount:

2024 07 17 202828

Using a hot knife to cut the plastic is FAR cleaner and easier than using a Dremel (what I used to trim the GPS tablet mount I installed a while back). This pic is just before I cleaned up the edges with a utility knife:

2024 07 17 194526

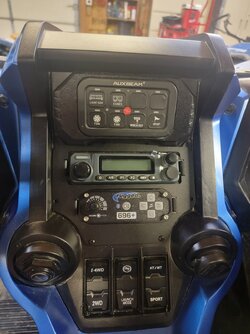
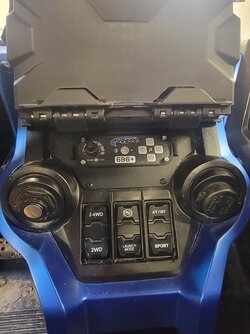
Test fitting the radio/intercom setup. The custom Talon mount from RR covers up everything nicely:

2024 07 17 202247

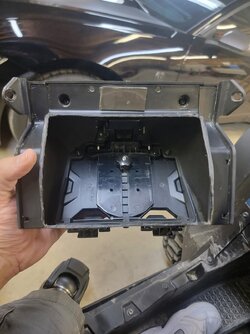
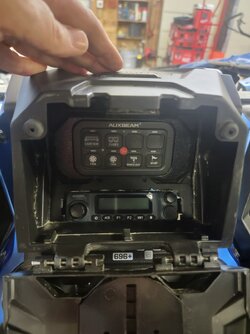
I had to recut the GPS tablet mount that I picked up from Amazon last fall so that the bottom edge did not hit the G1 radio once I reinstalled the mount. Essentially, the entire back panel is gone:

2024 07 17 202506
1721313244597


The only thing I was worried about was that bottom edge of the tablet mount. I was worried that it would line up right in front of either the intercom or the G1 radio. Luckily, that bottom edge falls exactly in between the two devices. The intercom will be fully accessible without opening the mount cubby, and the GMRS radio will be accessible simply by flipping the door open.

I like it this way because, once I set the channel we're going to be on, I won't typically need to access it for the rest of the ride/day. There is a separate on/off switch for the entire comms system that will be installing. This way, I don't have to re-adjust the volume every time we get in (volume knob on radio powers radio on/off):

2024 07 17 202306 2024 07 17 202322

So if you happen to run one of these GPS tablet mounts and were wondering if the Rugged Radios Talon mount for the intercom and radio will work together without to much effort ... the answer is 'yes'.

Next up are the cable runs for antenna, headsets, and power. This project will definitely take more than a day or two.
 
C

Candis

Member
Supporting Member
May 9, 2019
19
73
13
Colorado
Ownership

  1. Talon R4 LV
Began the long install of the Rugged Radios setup for the Talon.

Hood, upper cowl panel, and full glass windshield removed to facilitate the installation and wiring.

Mounting the 696+ intercom and G1 GMRS radio into the Talon mount:

View attachment 437451

Using a hot knife to cut the plastic is FAR cleaner and easier than using a Dremel (what I used to trim the GPS tablet mount I installed a while back). This pic is just before I cleaned up the edges with a utility knife:

View attachment 437446

Test fitting the radio/intercom setup. The custom Talon mount from RR covers up everything nicely:

View attachment 437452

I had to recut the GPS tablet mount that I picked up from Amazon last fall so that the bottom edge did not hit the G1 radio once I reinstalled the mount. Essentially, the entire back panel is gone:

View attachment 437453 View attachment 437456

The only thing I was worried about was that bottom edge of the tablet mount. I was worried that it would line up right in front of either the intercom or the G1 radio. Luckily, that bottom edge falls exactly in between the two devices. The intercom will be fully accessible without opening the mount cubby, and the GMRS radio will be accessible simply by flipping the door open.

I like it this way because, once I set the channel we're going to be on, I won't typically need to access it for the rest of the ride/day. There is a separate on/off switch for the entire comms system that will be installing. This way, I don't have to re-adjust the volume every time we get in (volume knob on radio powers radio on/off):

View attachment 437454 View attachment 437455

So if you happen to run one of these GPS tablet mounts and were wondering if the Rugged Radios Talon mount for the intercom and radio will work together without to much effort ... the answer is 'yes'.

Next up are the cable runs for antenna, headsets, and power. This project will definitely take more than a day or two.
Nice pictures and descriptions
 
  • Like
Reactions: Scoop
Scoop

Scoop

Well-Known Member
Lifetime Member
Supporting Member
Sep 7, 2021
5,224
20,673
113
Michigan
Ownership

  1. Other Brand

  2. 1000-5

  3. Talon R LV
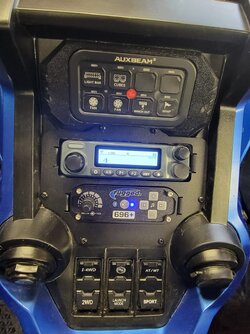
All cables have been run - headsets, power, antenna, etc. Most things hooked up power-on tested -- will need to test comms, radio, BT devices, as well as interference from anything on the buggy (fingers crossed). Also need to get some ROPS radio jack mounts for the headset connectors.

Powered up:

20240718 223052

Main switch for all comms so I don't have to adjust volume every time I get in. This runs through a Rugged Active Noise Filter, then to the radio and intercom.

20240718 223057

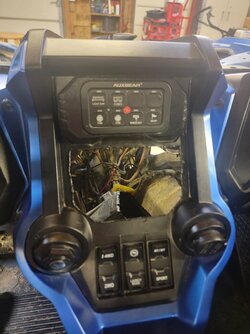
I had to remove the cubby to make way for the radio/intercom combo, so I had to relocate my dual voltmeter and USB power outlets.

20240718 223113

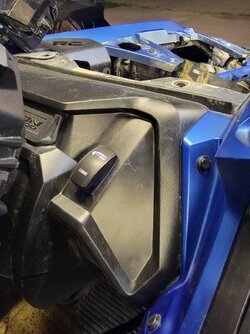
Driver and Co-Driver push-to-talk buttons installed.

20240718 223248

Tomorrow I should be installing the antenna, reinstalling the GPS mount, cleaning up wiring & zip ties, reinstalling the windshield, and buttoning everything back up.
 
Last edited:
TripleB

TripleB

Well-Known Member
Lifetime Member
Aug 13, 2018
16,167
146,089
113
Caryville, Tennessee
Ownership

  1. 1000-3

  2. 1000-5
Began the long install of the Rugged Radios setup for the Talon.

Hood, upper cowl panel, and full glass windshield removed to facilitate the installation and wiring.

Mounting the 696+ intercom and G1 GMRS radio into the Talon mount:

View attachment 437451

Using a hot knife to cut the plastic is FAR cleaner and easier than using a Dremel (what I used to trim the GPS tablet mount I installed a while back). This pic is just before I cleaned up the edges with a utility knife:

View attachment 437446

Test fitting the radio/intercom setup. The custom Talon mount from RR covers up everything nicely:

View attachment 437452

I had to recut the GPS tablet mount that I picked up from Amazon last fall so that the bottom edge did not hit the G1 radio once I reinstalled the mount. Essentially, the entire back panel is gone:

View attachment 437453 View attachment 437456

The only thing I was worried about was that bottom edge of the tablet mount. I was worried that it would line up right in front of either the intercom or the G1 radio. Luckily, that bottom edge falls exactly in between the two devices. The intercom will be fully accessible without opening the mount cubby, and the GMRS radio will be accessible simply by flipping the door open.

I like it this way because, once I set the channel we're going to be on, I won't typically need to access it for the rest of the ride/day. There is a separate on/off switch for the entire comms system that will be installing. This way, I don't have to re-adjust the volume every time we get in (volume knob on radio powers radio on/off):

View attachment 437454 View attachment 437455

So if you happen to run one of these GPS tablet mounts and were wondering if the Rugged Radios Talon mount for the intercom and radio will work together without to much effort ... the answer is 'yes'.

Next up are the cable runs for antenna, headsets, and power. This project will definitely take more than a day or two.
You're gonna look like those faggot KRX guys now.
 
Scoop

Scoop

Well-Known Member
Lifetime Member
Supporting Member
Sep 7, 2021
5,224
20,673
113
Michigan
Ownership

  1. Other Brand

  2. 1000-5

  3. Talon R LV
Tomorrow I should be installing the antenna, reinstalling the GPS mount, cleaning up wiring & zip ties, reinstalling the windshield, and buttoning everything back up.
Welp, the RR project is on a partial temporary hold. I decided I didn't want my headset jacks and other bits looking all ghetto, and I didn't want to drill a hole in the roof for the antenna. Also needed a mount to hang the headsets on when we were not riding.

Just ordered some bits form Axia Alloys (all in black e-coat) : Two single radio headset jack mounts + 2" clamps, one headset hanger + 2" clamp, and one adjustable radio antenna mount + 2" clamp.

-=-
UPDATE: The clamp sizes for the jack mounts were wrong. The lower crossbar behind the seats was 1.375", not 2". Reordered the clamps only.
-=-

Also ordered some small bits from Rugged: Dura-Link cable plugs for the headset jacks (seals/covers when no headset is connected), a coax cap for the NMO antenna mount (for if/when the antenna is removed), and a couple of crimp on PL-259 connectors. The 15' coax antenna cable is too long, and I don't want to play the "just feed it all around the vehicle so there isn't a coil of wire" game. Always get two, in case you screw the first one up, you don't have to wait on another order and pay more shipping.
 
Last edited:
advertisement

About us

  • Our community has been around for many years and pride ourselves on offering unbiased, critical discussion among people of all different backgrounds. We are working every day to make sure our community is one of the best.

User Menu

Buy us a beer!

  • Lots of time and money has gone into making sure the community is running the best software, best designs, and all the other bells and whistles. Care to buy us a beer? We'd really appreciate it!

    Beer Fund!

    Club Membership!