P1000 Bus Bar Mounting Location…

N

Nvrgiveup

Guest
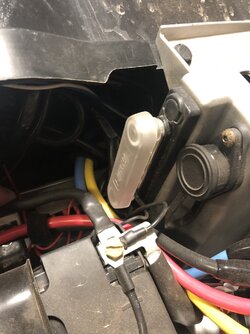
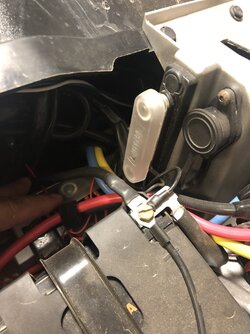
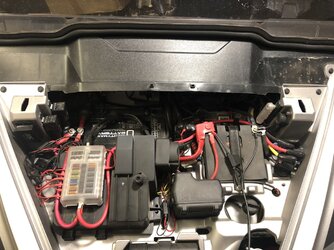
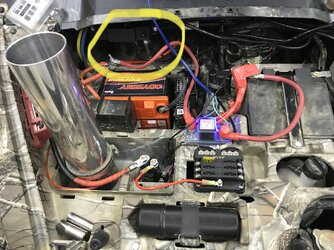
I have looked through countless threads and viewed a ton of pics and haven’t seen anyone who mounted their negative bus bar in this spot. It seems as though it allows ample room to add connections. For those of you with decked out rigs, is this mounting spot gonna create lack of space issues when I add a winch with its electrical components mounted under the hood?
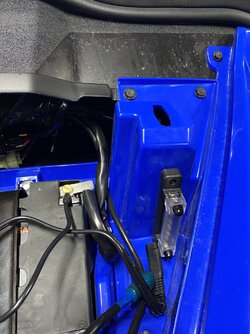
BE43C9CB 3817 45E0 842C F72C0216F38F
 
Scoop

Scoop

Well-Known Member
Lifetime Member
Supporting Member
Sep 7, 2021
5,047
19,921
113
Michigan
Ownership

  1. Other Brand

  2. 1000-5

  3. Talon R LV
My winch contactor would not be able to fit where it's at had I mounted my negative bus bar where you did. When I install things like this, I try to mount where it's accessible while also maximizing the use of what little space I have under the hood.

Screenshot 20211218 092238 Dropbox
 
N

Nvrgiveup

Guest
My winch contactor would not be able to fit where it's at had I mounted my negative bus bar where you did. When I install things like this, I try to mount where it's accessible while also maximizing the use of what little space I have under the hood.

View attachment 309373

And that’s exactly why I asked that question. I will go ahead and pull the main battery so my fat fingers can mount the bus in the spot yours is in, which was my original thought anyway.


Sent from my iPhone using Tapatalk
 
Scoop

Scoop

Well-Known Member
Lifetime Member
Supporting Member
Sep 7, 2021
5,047
19,921
113
Michigan
Ownership

  1. Other Brand

  2. 1000-5

  3. Talon R LV
And that’s exactly why I asked that question. I will go ahead and pull the main battery so my fat fingers can mount the bus in the spot yours is in, which was my original thought anyway.


Sent from my iPhone using Tapatalk
You don't have to pull the main battery to install that. I have big hands and had no problem.
 
Scoop

Scoop

Well-Known Member
Lifetime Member
Supporting Member
Sep 7, 2021
5,047
19,921
113
Michigan
Ownership

  1. Other Brand

  2. 1000-5

  3. Talon R LV
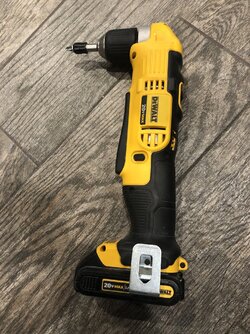
I have found this tool to be very useful when installing and working under the hood. You can use it to drill holes and install/remove screws and such. Among other things, I used it to install my two bus bars in those locations.


For the bus bars, don't use a step bit (as seen in the pic in that post). Just a standard drill bit (hex ends to fit the tool) and a couple of screws.

Best ~$20 I've spent in a long time.
 
Last edited:
Scoop

Scoop

Well-Known Member
Lifetime Member
Supporting Member
Sep 7, 2021
5,047
19,921
113
Michigan
Ownership

  1. Other Brand

  2. 1000-5

  3. Talon R LV
Better pic of its use. I installed a relay here.

Screenshot 20211218 094058 Edge


I originally bought it for one use (installing the relay for the dual battery setup as seen in the linked thread in my previous post and just behind the tool in the pic above). But I've *had* to use it a dozen times or more since, as there would have been no way to fit the drill in to drill holes in many places.

In fact, I used it again just yesterday when I installed my RAD Customs shifter covers. The SATV flip up windshield has a lip on the lower half that makes it impossible to drill (straight) holes for the screws up towards the top of the two plates. This tool made easy work out of that.
 
Last edited:
Worse1

Worse1

Well-Known Member
Jul 14, 2020
145
554
93
Arizona
Ownership

  1. 1000-5
Better pic of its use. I installed a relay here.

View attachment 309379

I originally bought it for one use (installing the relay for the dual battery setup as seen in the linked thread in my previous post and just behind the tool in the pic above). But I've *had* to use it a dozen times or more since, as there would have been no way to fit the drill in to drill holes in many places.

In fact, I used it again just yesterday when I installed my RAD Customs shifter covers. The SATV flip up windshield has a lip on the lower half that makes it impossible to drill (straight) holes for the screws up towards the top of the two plates. This tool made easy work out of that.
I used this guy. He did a great job.

BD46A68E DFEF 41A6 A4A4 AA690650DC80
 
advertisement
N

Nvrgiveup

Guest
I used this guy. He did a great job.

View attachment 309452

I didn’t wanna spend the money for the right angle drill and went ahead and did it with the standard DeWalt 20v. It was a pain to install the bus bar on that right side. I also ended up putting negative on left and positive on the right.
But a standstill because the factory battery bolts need to be a little longer. But it isn’t the first time I’ve been told I need more length!
I’ll finish up the dual battery tonight and then do the fuse box and switch panel install next week.


Sent from my iPhone using Tapatalk
 
Scoop

Scoop

Well-Known Member
Lifetime Member
Supporting Member
Sep 7, 2021
5,047
19,921
113
Michigan
Ownership

  1. Other Brand

  2. 1000-5

  3. Talon R LV
I didn’t wanna spend the money for the right angle drill and went ahead and did it with the standard DeWalt 20v.
That little DeWalt accessory that turns your normal cordless drill into a right angle drill was only $19.99 @ Lowes. Worth every penny and I've used it a dozen times or more on the P1K5 accessory installs.
 
Ridinfool

Ridinfool

NTC’ s special Ed student of the year
Lifetime Member
Supporting Member
Mar 20, 2020
36,144
386,046
113
Western North Carolina
Ownership

  1. 1000-5
I mounted mine to the cross bar that is just under the plastic right above where the second battery goes. Then ran the factory ground that Honda puts in for the winch to that then all other grounds to that. Has worked well. I’ll see if I have a pic, if not I’ll try and get you one later today.
 
Ridinfool

Ridinfool

NTC’ s special Ed student of the year
Lifetime Member
Supporting Member
Mar 20, 2020
36,144
386,046
113
Western North Carolina
Ownership

  1. 1000-5
Looks clean, nice job! What gauge wire/cable is that going from the batty to the relay and what gauge from relay to the fuse box? I’m thinking I will use either 4AWG or 5AWG for those 2 connections.


Sent from my iPhone using Tapatalk
Thank you, I cheated and bought some pre made battery cables from an auto parts store and some crimp on terminals in case I needed to shorten the cables. If I remember correctly I think they were #5 or #6 cable. Hope that helped.
 
N

Nvrgiveup

Guest
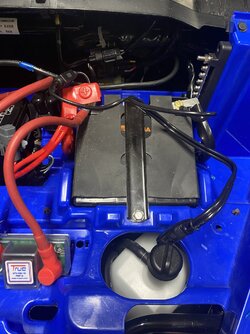
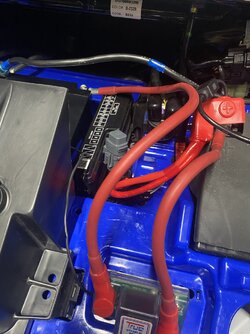
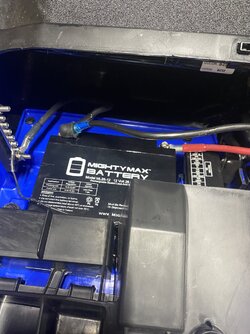
Got it finished, boys. The cold made it tough to route the cables where I want them, so it looks kinda whopperjawed and almost resembles an inner-city hotwire. Also, the Velcro adhesive for securing the isolator wasn’t holding (cold temps suck). Don’t be too hard on me but here’s the semi-finished install of the the dual battery ONLY. Switch plate & fuse block is next week’s project. Tried to attach a video but it’s too large, and for the record, that’s the ONLY thing I have that I’ve been told is “too large!” #whiteguyproblems

BC27A15B A975 4393 B577 5AA3DCA35E38 F3E41E71 05C3 4451 9D5D CF283ADDF3AD 0456F693 14D4 427B B441 14D7EC451514
 
Scoop

Scoop

Well-Known Member
Lifetime Member
Supporting Member
Sep 7, 2021
5,047
19,921
113
Michigan
Ownership

  1. Other Brand

  2. 1000-5

  3. Talon R LV
Progress!

Ideally, your Battery Tender for charging the batteries should be connected to the AUX battery, not the primary, as it's most likely going to be the one in need of charging first.
 
advertisement