ohanacreek
My EcoBoost has I4WD
Moderator
Lifetime Member
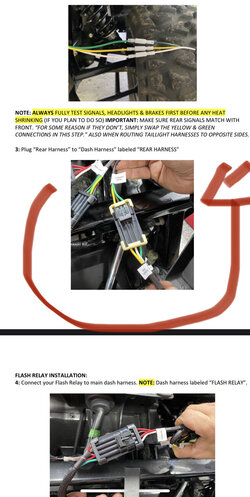
I have plans to make mine street legal so I picked up a TurnPro Deluxe kit.
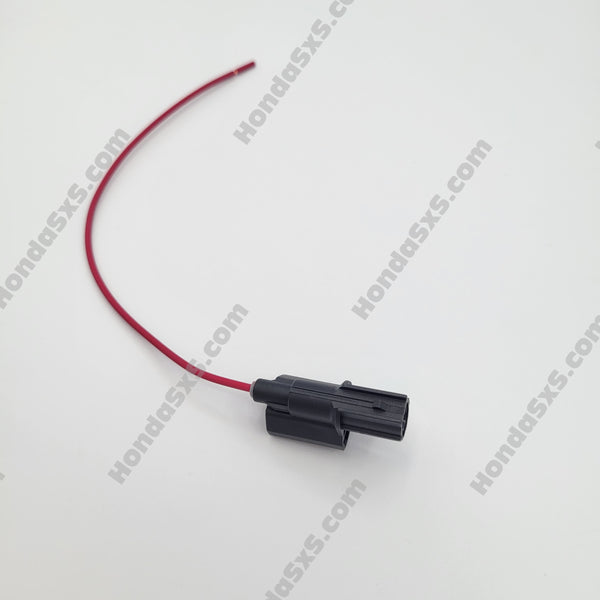
It has the Horn and the Trailer Pigtail included.
The instructions are pretty clear, a little more detail on mounting and splicing locations could be provided for the rear lights(I should have taken a before shot of where I spliced into the rear lights but all I have is an after).
Otherwise I really like the kit.
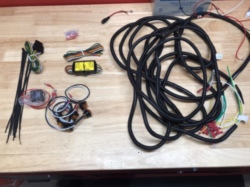
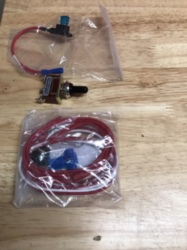
For this I will be using this portion of the kit.
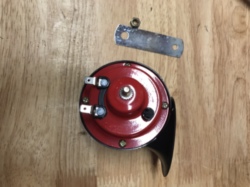
This thing sounds really good far better than the generic AutoZone horn I already had and was going to replace
The included horn button, add-a-circuit, and turn signal switch included with the kit will be set aside since I already had a lighted horn button, lighted DPDT switch from OTRATTW(to give me a dash signal indicator), and a circuit on my PDM60 that I was already using for the crappy horn I had installed.
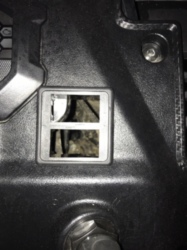
I started by finding locations for switches by the steering wheel.
Be warned the location on the right side will really only be good for a single switch as the gauge cluster sticks out under where I cut my hole. Luckily the upper switch in the picture with no rocker is going to be used for a purpose where I only needed the switched contacts and not the ground or led contacts, so I was able to cut them off and grind them down to make it fit.
If you're going to put two switches on one side the left side would be best.
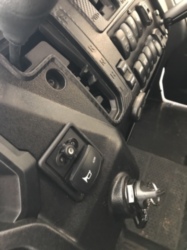
If you install rockers where I did I advise against using a plastic switch slot, the dash is curved enough it doesn't quite sit flush but it's too late for me.
Instead install them separately like I have the turn signal switch.
I am going to add a Hazard switch directly below it and wire in the TurnPro harness with the diodes.
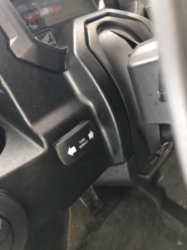
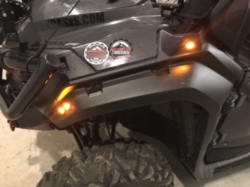
Next I installed the front lights, a ¾" wood paddle bit is perfect. I measured them so they would be sitting evenly spaced and centered. Drilled the holes and pushed the grommets in then the lights.
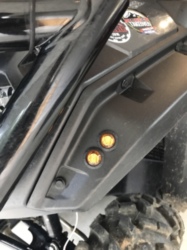
I placed on high and on the side of the a pillar just because three wouldn't fit on the fender flare.
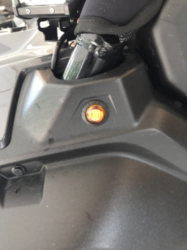
I think I will order (6) more similar lights and splice them in since the Honda Accessory bumper makes it hard to see from all angles.
I'll place them on the outer edge of the factory head lights.
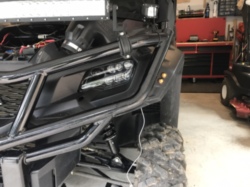
This location is perfect due to being able to run the wiring harness between the inner fenderwell and the fender. It protects it front limbs and sticks and other things trying to rip it out.
With that out of the way I moved onto the horn.
The only space I had left under the hood was here. So I bent the bracket to lift it up and over the factory relays.
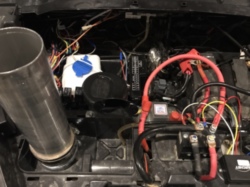
I ran the TurnPro harness along the crossbar and down into the space between the fenders. The sides are labeled so it's fairly difficult to screw up and get them backwards but also not a big deal if you do. Since it's easy to re-run the wires.
The White Wire on the TurnPro harness is GROUND.
Red is Positive from battery, So anywhere along the harness you can splice into these wherever is convenient to get power.
Since my PDM60 is mounted to the passenger side of the under hood area I placed the flasher relay under the dash along with the extra wire from the front turn signal portion of the harness.
Then spliced into the TurnPro harness and got power and ground to my PDM60 and ground point under the hood.
I was able to use the same splice to get power/ground to the flasher, my turn and my horn switches.
I then connected the green and yellow wires to the turn switch and fed the positive output to the horn from its switch.
Using the supplied switches is even easier they plug right into the harness you just have to find a place to mount them that you're happy with and can reach.
The power feed in the middle of the harness for the 700 I cut off and taped the ends. As I didn't need it where it was.
Now to the dirty part.
Drop your skid plate, cause you've got to run the wires along the inside of the Drivers side of the lower framerail. Then up the upright just to the rear of the engine and DCT filters, this will bring it right to the rear light harness.
This is where I should have taken a before shot. Oops.
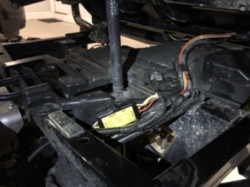
With the ignition off and battery disconnected cut the factory harness about the middle of where I have the converter mounted. It's 6 wires in a ¼" wire loom running right where I have the Converter mounted.
(2) BROWN-TailLights
(2) GREEN- Ground
(2) GREEN/YELLOW - Brake Lights
Then you have the TurnPro Harness you just ran back there.
White-Ground
Green-Right Turn
Yellow-Left Turn
Follow the rear portion of the harness back to a point under and in front of the tailgate to a connector. Disconnect the connector and pull that portion you cut loose away from the machine.
Again another before shot would've been helpful. You can just see the factory connector to the right of the left pivot point of the bed.
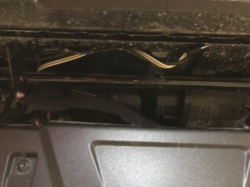
On the cut end strip and twist the two green wire together and do the same with the two brown wires.
Next it's helpful to have a 12v DC power source whether it's a spare battery or a 120 to 12v power supply.
I used a spare battery I have just for this purpose along with some alligator clips.
Take the pigtail and plug it back into the harness, while you're at the rear of the machine. Connect the GREEN to the negative side of your power source and then pick one of the green/yellow wires from the rear portion of factory harness. Very conveniently one runs the left brake light and one runs the right one. Note which side lights up for the one you picked.
Take the converter, the rear portion of the harness and the trailer pigtail (if included in your kit) over to a work bench. You can make all of these connections there much easier.
Connect the "trailer" side of the converter to the rear portion of the harness( and trailer pigtail)
Converter----Harness[Pigtail]
White-----Green [White]
Brown----Brown[Brown]
Yellow----Grn/Yel for left Brake[Yellow]
Green----Grn/Yel for right Brake[Green]
Once you've made all these connections, you can take this new harness with the converter back to the machine and rerun it the factory route back to the connector under and in front of the tailgate.
Clean the plastic with rubbing alcohol and stick the converter in place.
Here's the last bit.
To the Vehicle/Car side of the converter
Converter----Factory Harness[TurnProHarness]
White-----Both Green[White from TurnPro Harness]
Brown----(1) of the two Brown
Yellow----[Yellow from TurnPro Harness]
Green----[Green from TurnPro Harness]
Red------(1) of the two Green/Yellow

Reconnect the battery, turn key on and check the operation.
Last step find a cold beverage and enjoy your handy work.
It has the Horn and the Trailer Pigtail included.
The instructions are pretty clear, a little more detail on mounting and splicing locations could be provided for the rear lights(I should have taken a before shot of where I spliced into the rear lights but all I have is an after).
Otherwise I really like the kit.
For this I will be using this portion of the kit.

This thing sounds really good far better than the generic AutoZone horn I already had and was going to replace

The included horn button, add-a-circuit, and turn signal switch included with the kit will be set aside since I already had a lighted horn button, lighted DPDT switch from OTRATTW(to give me a dash signal indicator), and a circuit on my PDM60 that I was already using for the crappy horn I had installed.

I started by finding locations for switches by the steering wheel.
Be warned the location on the right side will really only be good for a single switch as the gauge cluster sticks out under where I cut my hole. Luckily the upper switch in the picture with no rocker is going to be used for a purpose where I only needed the switched contacts and not the ground or led contacts, so I was able to cut them off and grind them down to make it fit.
If you're going to put two switches on one side the left side would be best.


If you install rockers where I did I advise against using a plastic switch slot, the dash is curved enough it doesn't quite sit flush but it's too late for me.
Instead install them separately like I have the turn signal switch.
I am going to add a Hazard switch directly below it and wire in the TurnPro harness with the diodes.

Next I installed the front lights, a ¾" wood paddle bit is perfect. I measured them so they would be sitting evenly spaced and centered. Drilled the holes and pushed the grommets in then the lights.

I placed on high and on the side of the a pillar just because three wouldn't fit on the fender flare.

I think I will order (6) more similar lights and splice them in since the Honda Accessory bumper makes it hard to see from all angles.
I'll place them on the outer edge of the factory head lights.

This location is perfect due to being able to run the wiring harness between the inner fenderwell and the fender. It protects it front limbs and sticks and other things trying to rip it out.
With that out of the way I moved onto the horn.
The only space I had left under the hood was here. So I bent the bracket to lift it up and over the factory relays.

I ran the TurnPro harness along the crossbar and down into the space between the fenders. The sides are labeled so it's fairly difficult to screw up and get them backwards but also not a big deal if you do. Since it's easy to re-run the wires.
The White Wire on the TurnPro harness is GROUND.
Red is Positive from battery, So anywhere along the harness you can splice into these wherever is convenient to get power.
Since my PDM60 is mounted to the passenger side of the under hood area I placed the flasher relay under the dash along with the extra wire from the front turn signal portion of the harness.
Then spliced into the TurnPro harness and got power and ground to my PDM60 and ground point under the hood.
I was able to use the same splice to get power/ground to the flasher, my turn and my horn switches.
I then connected the green and yellow wires to the turn switch and fed the positive output to the horn from its switch.
Using the supplied switches is even easier they plug right into the harness you just have to find a place to mount them that you're happy with and can reach.
The power feed in the middle of the harness for the 700 I cut off and taped the ends. As I didn't need it where it was.
Now to the dirty part.
Drop your skid plate, cause you've got to run the wires along the inside of the Drivers side of the lower framerail. Then up the upright just to the rear of the engine and DCT filters, this will bring it right to the rear light harness.
This is where I should have taken a before shot. Oops.

With the ignition off and battery disconnected cut the factory harness about the middle of where I have the converter mounted. It's 6 wires in a ¼" wire loom running right where I have the Converter mounted.
(2) BROWN-TailLights
(2) GREEN- Ground
(2) GREEN/YELLOW - Brake Lights
Then you have the TurnPro Harness you just ran back there.
White-Ground
Green-Right Turn
Yellow-Left Turn
Follow the rear portion of the harness back to a point under and in front of the tailgate to a connector. Disconnect the connector and pull that portion you cut loose away from the machine.
Again another before shot would've been helpful. You can just see the factory connector to the right of the left pivot point of the bed.

On the cut end strip and twist the two green wire together and do the same with the two brown wires.
Next it's helpful to have a 12v DC power source whether it's a spare battery or a 120 to 12v power supply.
I used a spare battery I have just for this purpose along with some alligator clips.
Take the pigtail and plug it back into the harness, while you're at the rear of the machine. Connect the GREEN to the negative side of your power source and then pick one of the green/yellow wires from the rear portion of factory harness. Very conveniently one runs the left brake light and one runs the right one. Note which side lights up for the one you picked.
Take the converter, the rear portion of the harness and the trailer pigtail (if included in your kit) over to a work bench. You can make all of these connections there much easier.
Connect the "trailer" side of the converter to the rear portion of the harness( and trailer pigtail)
Converter----Harness[Pigtail]
White-----Green [White]
Brown----Brown[Brown]
Yellow----Grn/Yel for left Brake[Yellow]
Green----Grn/Yel for right Brake[Green]
Once you've made all these connections, you can take this new harness with the converter back to the machine and rerun it the factory route back to the connector under and in front of the tailgate.
Clean the plastic with rubbing alcohol and stick the converter in place.
Here's the last bit.
To the Vehicle/Car side of the converter
Converter----Factory Harness[TurnProHarness]
White-----Both Green[White from TurnPro Harness]
Brown----(1) of the two Brown
Yellow----[Yellow from TurnPro Harness]
Green----[Green from TurnPro Harness]
Red------(1) of the two Green/Yellow

Reconnect the battery, turn key on and check the operation.
Last step find a cold beverage and enjoy your handy work.


