When your Pioneer 1000 dies while shifting down or dies when putting in gear there's a very good chance it's due to a dirty shift motor. There is usually different codes that get thrown . Also after the machine cools down it will work properly for awhile until it shuts down again.
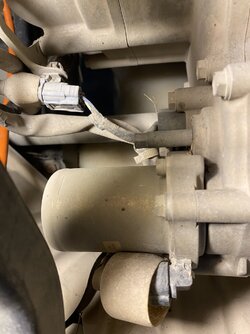
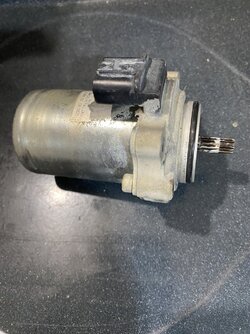
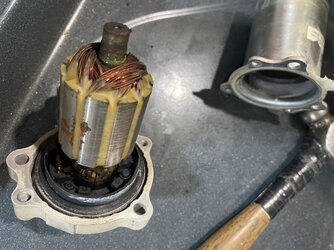
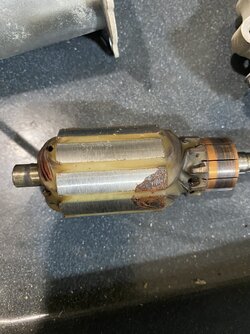
Open the dump bed , on the right hand side down by the exhaust pipe is the shift/control motor . Un plug the wires and remove the 3 10mm head bolts and remove the little motor. There is a o-ring on the motor housing. Once on the bench use a allen wrench to remove the 2 allen head bolts that hold the motor together . Seperate the end pieces from the main motor body. There wll be a plastic brush holder sandwiched between them.Once you have everything apart you will see how dirty everything is and how badly the armature where the brushes run are carboned. Clean the armature with fine sandpaper or emery cloth back to the copper color. [ I put the armature in my drill press and let it run slow speed and held the emery against the armature to clean] Once everything is cleaned apply a bit of grease to the armature bushing end . The best way to put it back together is to put the brushes and brush holder [the plastic piece] onto the armature first so that you can get the brushes put back over the armature . Hold tightly onto the end of the shaft that sticks out from the brushes. The reason to hold it tight is because when you place the armature into the housing the magnetism is going to suck the armature into it and you won't beable to put the brushes back into place. Of course once its together install and try it out. It's fairly simple to do. But you can see just how dirty it does get and this is what causes them to fail and the machine stops shifting properly and throws different codes. This is something that needs to be done every 6000 miles or 10,000 klms. This one I let it go for 14,000 klms and as you can see it's very dirty. Best part no parts to buy just a little time. BTW my machine is used for trail and roads. Very seldom will water ever get over 1/2 way up the tires. Hope this helps with anyone who has shifting problems with different codes.
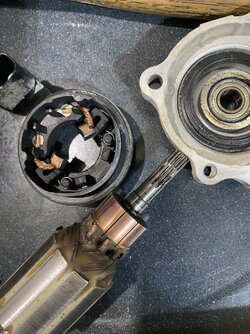
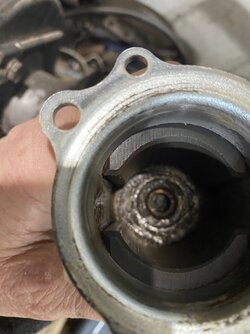
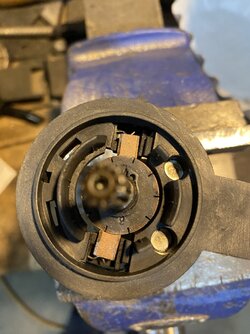
Open the dump bed , on the right hand side down by the exhaust pipe is the shift/control motor . Un plug the wires and remove the 3 10mm head bolts and remove the little motor. There is a o-ring on the motor housing. Once on the bench use a allen wrench to remove the 2 allen head bolts that hold the motor together . Seperate the end pieces from the main motor body. There wll be a plastic brush holder sandwiched between them.Once you have everything apart you will see how dirty everything is and how badly the armature where the brushes run are carboned. Clean the armature with fine sandpaper or emery cloth back to the copper color. [ I put the armature in my drill press and let it run slow speed and held the emery against the armature to clean] Once everything is cleaned apply a bit of grease to the armature bushing end . The best way to put it back together is to put the brushes and brush holder [the plastic piece] onto the armature first so that you can get the brushes put back over the armature . Hold tightly onto the end of the shaft that sticks out from the brushes. The reason to hold it tight is because when you place the armature into the housing the magnetism is going to suck the armature into it and you won't beable to put the brushes back into place. Of course once its together install and try it out. It's fairly simple to do. But you can see just how dirty it does get and this is what causes them to fail and the machine stops shifting properly and throws different codes. This is something that needs to be done every 6000 miles or 10,000 klms. This one I let it go for 14,000 klms and as you can see it's very dirty. Best part no parts to buy just a little time. BTW my machine is used for trail and roads. Very seldom will water ever get over 1/2 way up the tires. Hope this helps with anyone who has shifting problems with different codes.


